Saturday, December 31, 2011

Crepe dress completed!

Well it's only taken a year and a bit, but I've finally finished the Colette Crepe dress that I started as part of the Crepe Sew-a-Long, way back in November last year.

Why has it taken so long? Partly having trouble finding enough energy to sew as my fibromyalgia has flared on and off, but also I discovered part way in that the fabric I'd chosen was a right pain to work with. I was obviously so seduced by the colour and print that I failed to notice just it was completely unnatural.

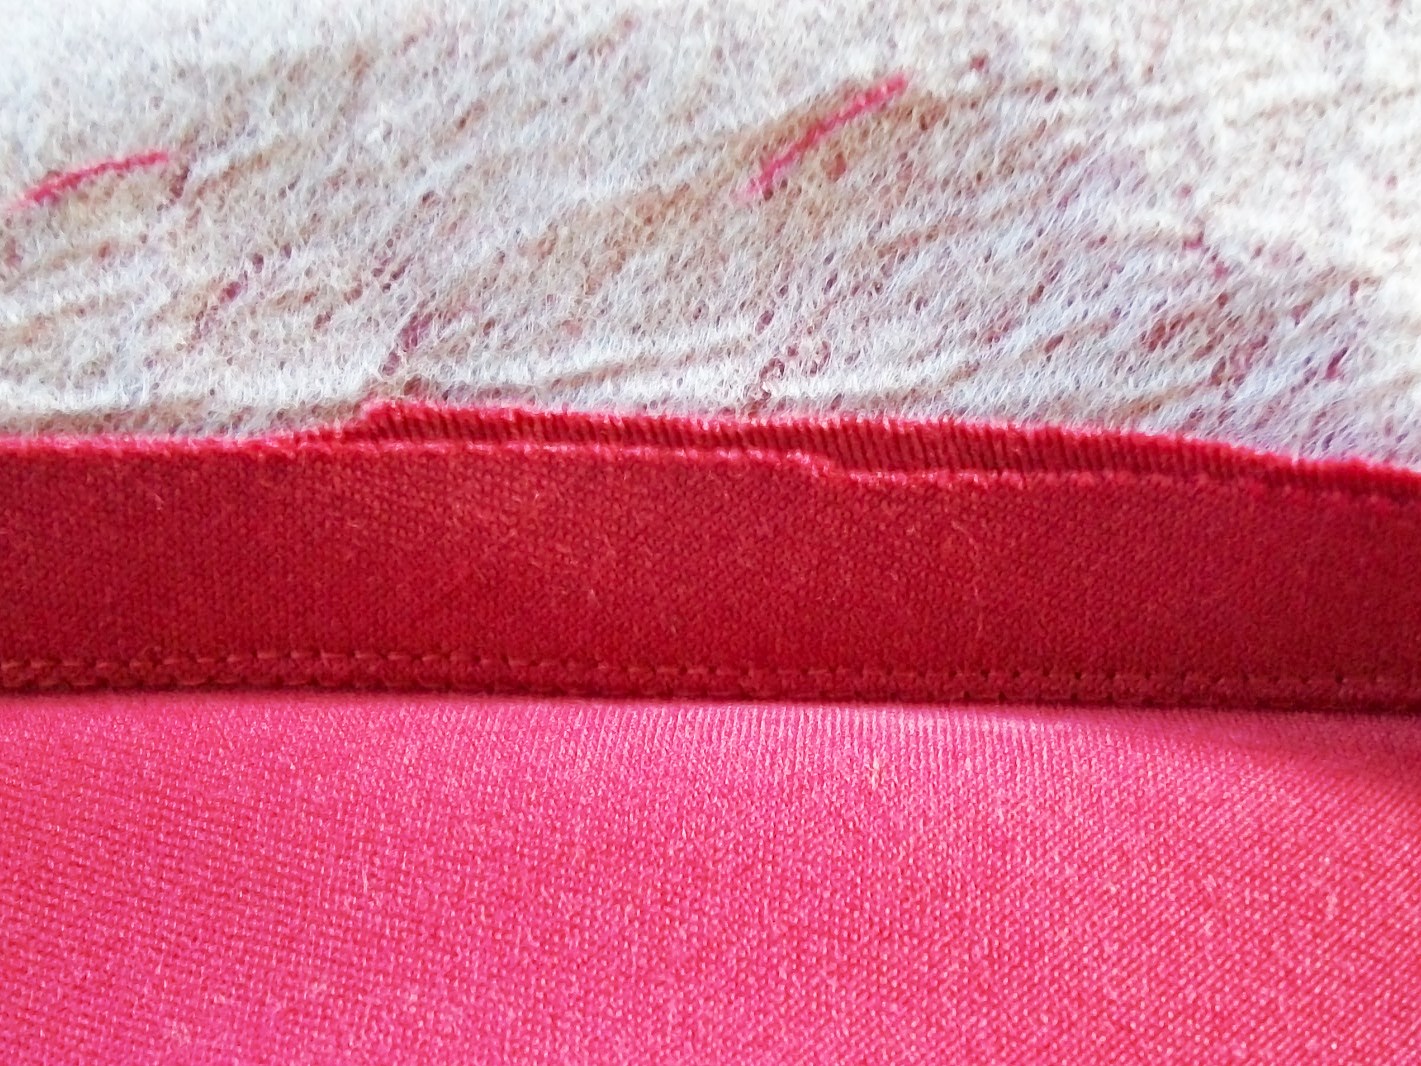
I discovered the synthetic nature of the fabric when I managed to accidentally melt some of it while pressing a facing. Fortunately, it was the facing that melted, not the bodice itself. It did however lead to the death of my iron after attempts to clean the melted mess from the iron plate managed to get water or something inside and fritz the electrics. Aside from it's tendency to melt, the "right" side of the fabric had a slightly raised print which the iron would constantly catch on. In short, the fabric turned an otherwise simple project into a complete palaver.

Fabric palaver aside, the dress is actually quite straightforward and easy to sew. I had no problems following the directions. I did french seams on the skirt, including the pockets. I under stitched my facings. The pattern needed a far amount of adjusting for my figure. As usual, I had to take a good inch off the bodice length. I also found that I needed to make the back narrower and adjust for my small, sloping shoulders.

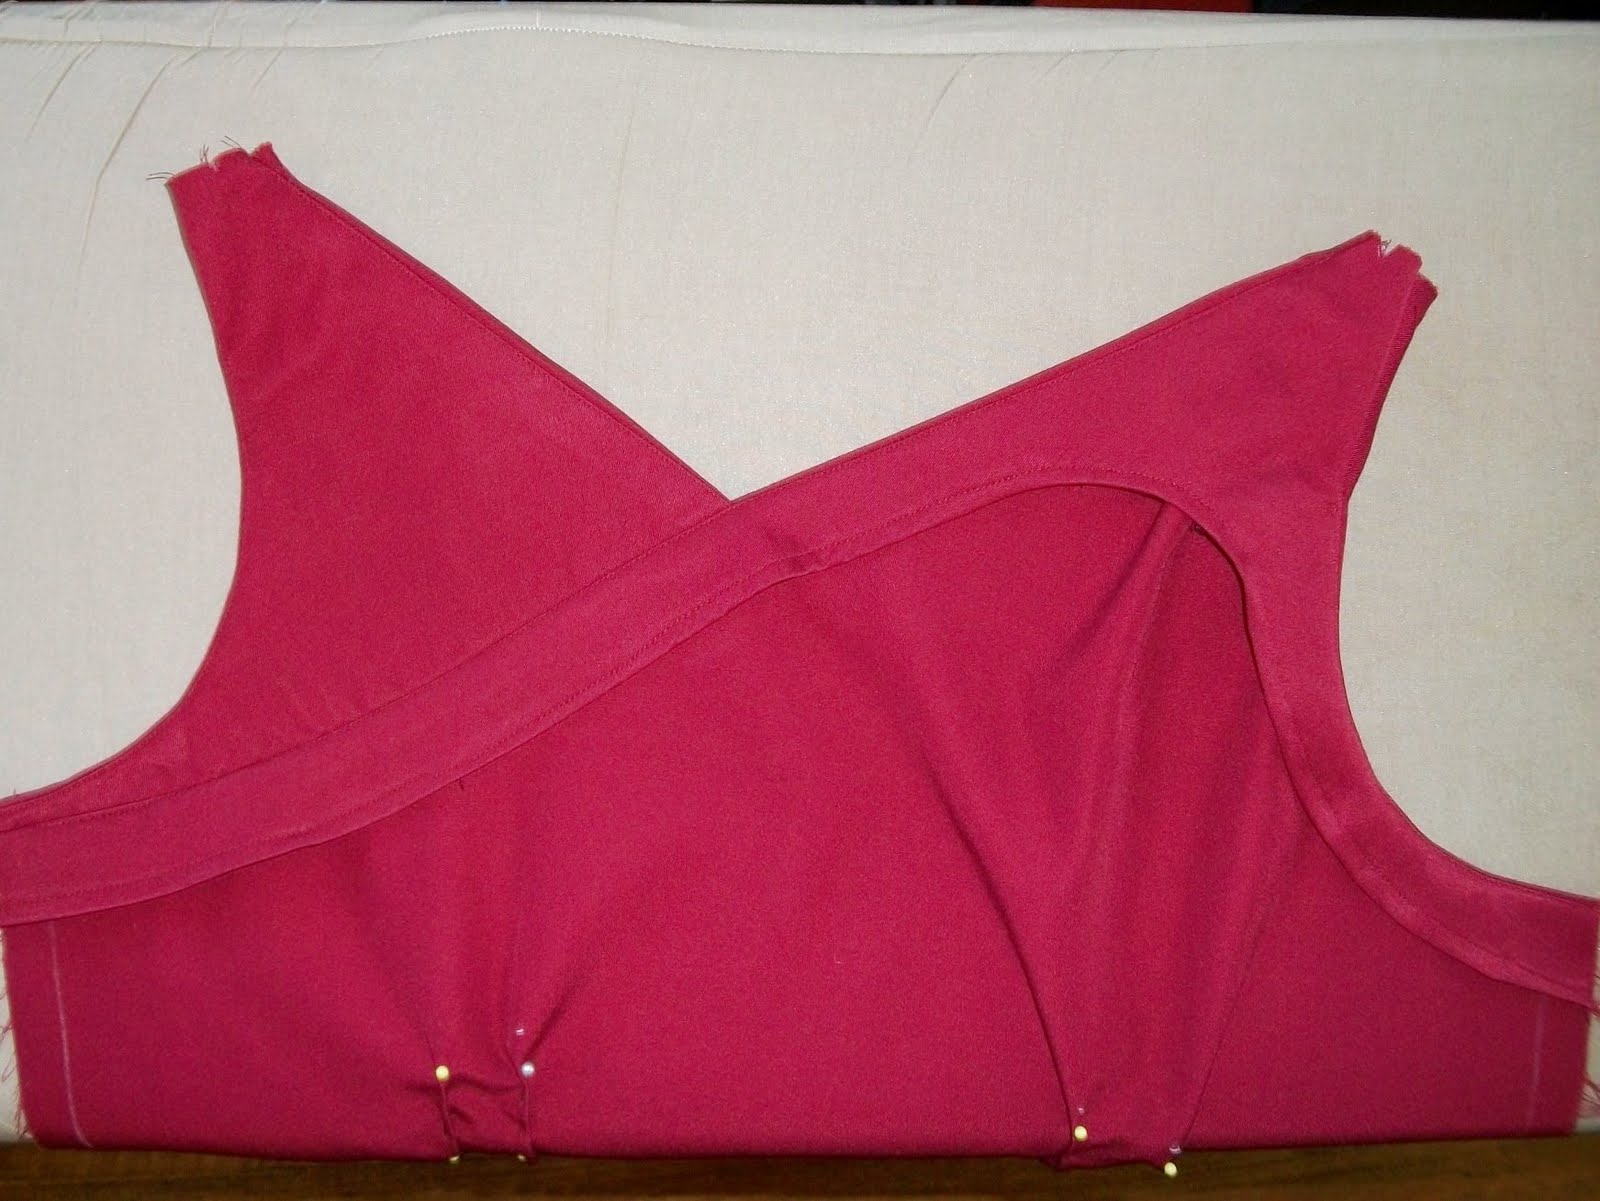
Here's how the bodice pattern pieces ended up changing with my final pattern overlaying the original pattern.

The end result is fits and looks okay. But just okay. I have to say honestly that I don't love this dress. I may still be scarred from dealing with the nightmare fabric, but I also think this isn't the best style for me. The cross over at the back was difficult to fit and still manages to gape when I move, which then makes it slip off my small shoulders. I think it could use some decoration to emphasise the neckline. I had elected not to do the waist ties in contrasting fabric as I find a contrasting band can often cut me in the wrong place and emphasise my very short-waist. I'm happy with what I've made, but I think this may be joining a number of other dresses in my wardrobe that just don't feel quite right.


At least my dog Princess was still happy to be seen (and photographed) with me. As often happens, the one photo that is in focus, is the one where I'm pulling a face or in this case, have my eyes closed. Look at the dress and the cute puppy, ignore the rest :)

Right, next!

Sunday, October 16, 2011

Buy Nothing New: Thrifty French Maid Costume

What do you do when you decide at the last minute you need a costume and nothing in your wardrobe fits the bill? In the spirit of Buy Nothing New Month, buying something new was out. I also don't like buying things that will get limited wearing. I could have gone to Savers to see what I could get second hand that could be reworked into a costume. However, thrifty sort that I am, I decided to see what I could do with what I already had to hand. This led to the Thrifty French Maid Costume.

The finished costume: Front, Side and Back views
 I used completely reclaimed material from my refashion/reuse stash including:
  • An old pair of black/dark grey satin pajamas I gave up on wearing as the polyester was too sweaty
  • An old white work shirt
  • Some offcuts of white netting from making curtains
  • A zipper reclaimed from a previous garment
The pajamas and shirt were disassembled into their separate pieces. I was going to make the dress from the black satin of the pajamas, the apron from the shirt, and a petticoat from the netting. The basic dress design was a fitted bodice, pleated short skirt, short puffed sleeves, and a zip at the back. I'll confess there was not a lot of preparation and planning that went into this project, so there was a fair bit of "design on the fly" and "winging it". It's also why there aren't any "before" or "in progress" photos. It was serious last minute sewing. However, I have drawn up a little diagram of how the dress pieces came out of the pajama pieces. The black line is the pajama piece and the red line is the dress piece.


I laid out the pieces of fabric I had to work with and started to plan pattern pieces. I used the bodice from a dress pattern that I'd recently fitted as a base and re-worked it to suit the shape I wanted. No time to do a muslin, I went straight to cutting out pieces, leaving a generous seam allowance where possible. I did a quick self-fit as I went along. For the skirt I cut eight slightly trapezoidal panels and sewed them into a circle. I then stitched the netting fabric to the top of inside of the skirt panels, then added some extra tiers to the lower edge of the netting to give it some "floof". To attach the skirt to the bodice, I put in box pleats placed to hide the seams of the individual skirt pieces. The zipper was inserted so it went down centre back of the bodice and into the skirt (so I could get it over my hips/shoulders). The small puff sleeves were made from the pajama sleeves buy cutting the sleeves in half and attaching the lower half to the upper half to create a wider circle to be gathered in to the bodice armscyth and create the puffed look. To do the gathering quickly, I used a trick I'd read recently and turned the sewing machine tension right up to 10. It effectively gathers the fabric as you sew, then you can just fudge the fabric along the stitching line to make it fit. On the ends of the sleeves I sewed a channel and inserted some thin elastic.
The "petticoat" layer under the skirt

I decided at that point that the dress really needed some kind of trim. I cut a bunch of long strips around 2" wide from the white shirt, pressing them half to create a smooth edge. I applied this around the bottom of the skirt and the bottom of the sleeves. I then used the white satin piping from the pajamas to edge the neckline.

The apron was fairly simple. A square for the top and a trapezoid for the bottom, plus a waist tie. I made a bunch of white strips from the shirt (as above), then gathered them using the sewing machine method above, to create a ruffled edge for the apron. I then soaked it in starch and pressed it to get that crisp feel.

 I also needed a little pleated head piece. I ended up using the shirt cuffs, which were nice and sturdy. I removed the buttons and cut off the bit with the button hole and stitched the two cuffs together to create a longer piece. I then pleated it and sewed it into what was the shirt collar band. It wasn't quite right until I folded the sides of the pleated cuffs down to the band to create a curved shape. Stitched those bits down and made the band taper thinner towards the ends. Tried it on and it stayed in place with bobby pins, so worked nicely.

And voila! The costume was made complete by the essential pair of black seamed stockings and a pair of black and white heels from my wardrobe. Not bad if I do say so myself.

A pair of pajamas, an old shirt, some curtain offcuts + 10 hours sewing = One thrifty (and sexy) french maid costume.

Sunday, October 9, 2011

Buy Nothing New Month: Make Do and Mend

One of the easiest ways to avoid having to buy new things is to look after and maintain the things you already have. You'd think that would be a statement of the obvious, but in the current throw-away consumer culture, people seem unwilling to consider making simple repairs to extend the life of an item.

The "Make-do and Mend" slogan  arose during World War II, where all kinds of resources were being redirected to the war effort and civilians had to learn to make-do with strictly rationed items of clothing, food, and other items. An interesting post on Make-do and Mend and rationing can be found over at the Coletterie blog here.

Some Make-do and Mend media from WWII, though I would recommend getting your bloke to take off his pants first before attempting to mend them.
There were a couple of notable books on how to make-do and mend, both in the UK and in the USA. Make And Mend For Victory was from the USA and published in 1942. The lovely Susannah from Cargo Cult Craft has put this on her website as a two part downloadable pdf. Make Do And Mend was from the UK and published around the same time. Reproduction copies can be bought from Amazon and similar places.


This is a darning mushroom
This weekend I decided to tackle my mending pile, which contained a couple of socks with holes, a pair of knickers with an unravelled side seam, a pair of pj bottoms with a rip, a dressing gown sash that had come apart, and a carry bag where the handles had almost pulled off. I was fortunate in growing up with a mother who sewed and often mended our clothes and household furnishings. I found out that not everyone had this experience growing up when I discovered that most people have no idea what a "sock mushroom" is. So let's start with my socks.
What I grew up calling a "sock mushroom", is more accurately called a "darning mushroom". It's a mushroom shaped item that you use to stretch the rounded toe or heel of a sock over so you can darn it. My mum had a plastic one where the "stem" could be unscrewed and you could store needles and pins inside. I'm more low tech and use a light bulb. It does the job quite adequately.

I'm not going to go into detail on how to darn socks. There are a variety of tutorials on eHow.com. Basically it involves sewing some base threads and weaving a patch over the offending hole in the sock. It really doesn't take long to do once you get the hang of it. It's something I often do in front of the TV in the ad breaks.

The grey pair I did with black thread so you can see the darned patch more easily. When darned with matching colour thread, it really isn't very noticeable, as you can see in the black pair, where I've circles the darned patch so you can actually find it!

The other items in my mending pile I repaired using the wonders of modern technology - the sewing machine and the overlocker (or "serger" if you're American). The overlocker is great for sewing up seams and finishing edges at the same time. I fixed the side seam of my knickers in about 5 seconds flat.

The pajama bottoms had torn where the fabric was getting a bit worn and thin. I'd previously stitched it up with the overlocker, but it had torn along the stitching line. So this time I decided to do a more stable repair and use a tight zig-zag stitch over the tear. It means the repair is more visible, but these are just pajamas so I'm not concerned about that.


The carry bag was a straight forward fix. It was a freebie with another purchase and a really good sized bag for carry larger items. Unfortunately, my partner had taken to using it to carry heavy tools and it had been picked up by only one handle, which caused it to rip away from the body of the bag. The repair simply involved finding some matching thread and resewing the handle back on along the original stitch lines. To prevent future repairs, I added some reinforcement stitching at the top. 

The dressing gown sash was a slightly more fiddly repair. It had mostly come undone at the join, but the fabric had also frayed. So the seam was completely unpicked, the frayed edges trimmed and joined with the overlocker, then flipped inside out and top-stitched in matching thread to close the seam.

On the whole, maybe an hours work on a Sunday to clear my mending pile and get six items back in use and avoid having to buy replacements. Next time you go to throw something out, think about whether it could be repaired and put back into service. It will save another item going to landfill and save your hip pocket from shelling out for a replacement.

Friday, September 30, 2011

Buy Nothing New Month - October 2011


I've submitted my pledge to Buy Nothing New for the month of October 2011. As you probably have gathered from this blog and my sustainable living blog over at Greening Our Life, not buying new things is a regular part of how I live. However, even though I think I'll find it easy to go without buying anything new for a month, I'm keen to encourage other people to give it go.

What exactly do you mean by Buy Nothing New?
Buy Nothing New month means that for one month (October 2011), with the exception of essentials* (food, drink, medications, hygiene products) you can beg, borrow, barter, swap or buy secondhand whatever you need. You just buy nothing new.
*I'm still out on whether I'd count buying supplies to make/repair things as "new". E.g. buying a new zipper to replace a broken one on a skirt, buying matching thread to fix a seam etc.. As much as possible I'm going to try and use things from my stash.

Why have a Buy Nothing New month?
Buy Nothing New is not about going without, nor is it Buy Nothing New Never.

It’s about taking October to reassess what we really need, think about where the stuff we buy comes from (finite resources), where it goes (landfill), and what our alternatives are.

It is about conscientious consumption and by not spending on stuff we don’t need, increasing our savings for the things we do need.
Pledge to Buy Nothing New during October and challenge over consumption.  
http://www.buynothingnew.com.au/why/

One of my biggest complaints about modern society is how much people are obsessed with having "stuff", especially cheap stuff. I cringe every time I go past yet another discount store selling crap mass produced from unsustainable materials using underpaid and undervalued labour.

A large part of my love of vintage clothing is that it came from a time when people valued quality of materials and workmanship. I have several beautiful suit jackets from the late 1940s that are far finer in the quality of the materials (pure worsted wool) and the workmanship. The tailoring is neat and well finished. No sloppy stitching and weak seams. They've lasted far better than anything I've ever bought new from a modern department store, including brands that are supposedly good quality.

Vintage to me also harks back to a time of "make do and mend". Clothes and other items were well cared for so they would last longer and mended when necessary to keep them usable. Modern society is very much a disposable society. Fashion moves so fast that clothes are considered out of date within months and the rapid turnover and desire for ever cheaper fashion has driven manufacturers towards the lowest cost materials and labour. While it may be great for some that they can get jeans for $10 from Kmart, the hidden costs are those born by those who labour in poor conditions, who are made sick from industrial pollution from the materials manufacturing process, and countries that exploit their own people to gain Western investment.

Things to think about
  • How many times have you bought a piece of clothing only to have it languish in the back of the wardrobe unworn? 
  • How many times have you succumbed to buying clothes because they were "such a bargain" only to have them fall to bits within a year? 
  • How many times have you thrown out a piece of clothing because it lost a button, broke a zip, had a stain, or had a seam pop?
I know in my lifetime I've been guilty of all of the above at some point. However, a few years ago I decided to make a conscious effort to put more thought into the clothes I buy. I look for quality rather than the cheapest option. I look for ethically and sustainably produced clothing. I look for locally made clothing. I'm prepared to pay more for better quality materials, good working conditions, and a fair wage for labour. I select clothing with consideration for how much use I will get from it. I am less inclined to buy clothing for a "one off" event. I take care when laundering my clothes to make sure I get longer wear from them. I alter and mend my clothes to keep them in my wardrobe for longer. Any clothes I no longer wear are donated to charity if they are in reasonable condition, or go into my refashion/fabric scraps box to be recycled into other things. Rarely does anything go into the rubbish.

Over the years I've acquired some of my favourite wardrobe pieces from non-new sources such as:
In a city like Melbourne, we really are spoilt for choice when it comes to second-hand or vintage clothing sources. Not only is buying second-hand more sustainable, it's also often less expensive which is great for the budget conscious.

As we go through October, I'll be posting what things I've sourced from non-new sources, as well as sharing some of my favourite ways to buy nothing new.

I encourage everyone to give Buy Nothing New month a go. It's just one month. When you go to buy something new, take a moment to pause and think:
  • Do I really need this?
  • Does it need to be new?
  • Is there another option to get this second-hand?

Sunday, February 20, 2011

Crepe Sew-Along - Cutting out the muslin


High on sewing success, I swung back into the Crepe Sew-Along project. Gertie has long since finished posting the sew-along steps on her blog, but that's the great thing about internet sew-alongs, you can technically join at any point and follow the posts.

Today I cut out the muslin of the bodice, following the steps posted by Gertie here.

It was just the right amount of sewing for me today. I found the instructions easy to follow. I noticed that Gertie uses tracing paper to transfer pattern markings to her muslin. I'd never thought about doing that. Make sense now that I see it. I didn't having any tracing paper so used the usual method (tailors tacks and eye-balling).


Gertie's next step was to thread trace the seam allowance. This is another new thing for me. I've never thought about machine sewing as a way of marking the seam allowance and certainly hadn't considered whether a muslin needed stabilising. Then again, I've usually made my "muslins" out of calico, poplin, twill or other fairly sturdy cotton rather than actual muslin (the only stuff I've ever found is that ultra fine muslin for baby wraps or the crinkly cheesecloth stuff). Still, open to trying new things so by the end of today I had my bodice muslin pieces cut out, markings transferred and seam allowance thread marked.

Just the right amount of sewing to fit the time I had between other activities.

Tuesday, February 15, 2011

Screen Siren 1960s Frock - Finished Dress


It's finished! I have a dress! Despite knowing that there is plenty of past evidence to support that I can in fact sew, I had lost confidence in my abilities. I am happy to say I have now regained my sewing mojo. Last Sunday was the last class in this project at Thread Den. It was the dreaded fitting and zipper and class. I'm pleased to say it all went fairly smoothly.

We did the shoulder seams, which I'm glad were explained as they were done differently to how I thought they were done. Then it was time to pin the side seams and put it on to check fit. The first good sign was that I could get it on over my clothes. The instructor was great in helping with the fitting. I'd forgotten how useful an extra person is for this stage. She let it out a bit at the hips (which I expected would need a bit more room), took it in little under the arms, and adjusted the darts to fit better around the bust and to move slightly higher on the back (probably a result of having taken an inch out of the length at the waist). Side sides and darts sewn up, it was time for the dreaded zipper.

Okay, turns out zippers are not anywhere near as complicated as I thought. This was a regular zipper, machine sewn in. No funky invisible zips, or lapped thingies. It was a simple case of pressing the fabric back at the sewn allowance, then lining the zipper up so the pressed edge of the fabric just covered the teeth, pinning it in, then machine sewing about 3/8" from the edge. Too easy! The only slight hiccup was that somewhere in my pinning and sewing, the zipper must have moved a bit and the top of the back pieces don't line up evenly. Could also be an error in my cutting out the back pieces.

I finished up the class with the final fitting checked and the hem pinned and only the hand sewing parts left to do (shoulder seams, hem, and hook & eye above the zipper). Once I got home, I decided I wanted to get the dress finished. I did the hand sewing in front of the TV after dinner. I must admit it took me a bit longer than I expected. I've clearly lost my previous hemming speed. And as is the Murphy's Law of sewing, the last thing you need to do gives you the most grief (the other law is that you will run out of thread an inch before the end). In this case, the damn hook and eye above the zipper was being difficult. I was tired by this point and losing my dexterity. I found it tricky to hold the little hook & eye bits in place and then sew them in. Then I sewed the hook in around the wrong way. Argh! But I got it done eventually. The top of the back pieces still isn't sitting great, but it's passable.

And now the photos! Please pardon the unpressed hem, the tired expression and the poor lighting. I will try to take some "dressed up" photos that better showcase the dress. Update: Here it is, all finished and out at Circa Nocturna. The black belt is from another frock. I felt it needed a belt. The flower is a brooch that just happened to match the fabric really well.
 I'm pretty happy with how it turned out. Definitely has that "Joan Holloway" wiggle dress look to it. I'd like to try the full skirted version of this pattern as well.

I think we can safely say that my sewing mojo has returned. Bring on the frocks!

Sunday, February 6, 2011

Screen Siren 1960s Frock - Sewing with a safety net

Well, it's finally happened. I've done some actual sewing! Today I went to the second class (of three) for the Screen Siren 1960s Frock. The first class was mostly spent cutting out the pattern and fabric, transferring markings etc.. And yes that took 3 hours. It's the most tedious part of sewing for me.

Anyway, today involved actual sewing. I'm glad now that I'm doing this dress as part of a class where I can ask questions and get someone to check what I'm doing. I had read the instructions that came with the pattern. Some bits were fine, others left me baffled. The diagrams didn't help. It was great to have someone demonstrate the various steps. Made it a lot more obvious.

My progress today was to attach the linings to the main body pieces and understitching them. I had heard the term understitching before, but didn't really know what it meant. This was one of those things I think the pattern company assumed you already knew. Turns out it is a way of making sure the lining doesn't roll over to the front of the garment. Basically you sew your lining and main piece together as normal. Then fold/press the seam over to the lining side. You then sew really close and parallel to the seam line on the lining side of the seam. It looks like this (there are two rows of stitching there, the seam line is right in the crease):
Then once you flip your fabric so that the right sides are on the outside and the seam on the inside it looks like this (front & back, where you can just make out the stitch line) and gives you a nice strong and smooth edge. Really does stop the lining from rolling over to the front and still looks quite neat on the inside.

I'm generally happy with my progress today. I managed to attach all the linings without much unpicking. Apparently before next class we need to have the back skirt slit done as well, so I have a little bit of homework.

These are the front and back pieces so far. The darts are just pinned at the moment (and those are my tailor's tacks looking all wiggly there)

I'm not happy with how the shoulder gathers are sitting on the front piece, especially the left shoulder (right in the photos). I tried doing a normal gather, but didn't like the uneven result, so decided to just fold a few pleats in. However, I think the angle of the pleats now doesn't match the angle of the neckline and that's making it look a bit wrong. Easy enough fix though as the shoulder pieces are still open. I am really happy with how the lining of the front piece is looking. Nice and clean.


Next Sunday we pin all the pieces together and do a fitting before sewing it up and adding the zipper in the back. I think this is the part I'm most worried about. I have a long history of making beautifully finished garments that fit dreadfully. And I hate that sinking feeling when you pin something together and put it on and realise immediately that it doesn't fit. In my case, it is usually too tight which is so much harder to fix than too loose. And I'm making the sheath dress version of this pattern, which is very fitted. The only alteration I've done so far has been to shorten the waist. I help the pattern piece against me and folded it up until the "waist" line was sitting at my waist. Took at least an inch of the original pattern. Hopefully this means the curves will be in the right places. The pattern has four pairs of vertical darts. I'm hoping that between the side sides, back seam and the eight darts, I should be able to get a good close fit. *fingers crossed*

I'm also apprehensive about zippers. The last time I remember putting a zipper in was my Year 8 sewing class in high school. I remember I got good comments on my zipper, but my brain has long since erased the know-how of zipper insertions. I will be grateful for having some help and advice on hand.

The best thing about today was realising that I haven't forgotten all my sewing know-how and can actually do this. I think it was good to have someone there to provide some guidance like where to start, and demonstrate some techniques and just check that we're doing things in the right order. It's a bit like sewing with a safety-net.

Sunday, January 23, 2011

Sew-along lack of progress, but a new project in the wings


I confess I'm not making much progress on the Crepe Sew-Along project. I have made it as far as tracing my size from the pattern onto vilene and cutting those out (photographic evidence below). I'd forgotten that the leaning, tracing, and cutting really flares my lower back, even when I paced it out into short periods. It's kind of put me off doing the next step of tracing the pattern out onto the muslin. I may perhaps need to enlist the help of the Cunning Plans Dept to do the tracing and cutting. Then I can get to some actual piecing together and fitting, which will lead to actual sewing.


In the meantime, I've signed up for another project. Towards the end of last year I decided to buy myself a Christmas present and signed up to a Vintage Style Swimsuit class, run by Thread Den. I thought it would be an excellent way to kick me in to some sewing if I had to turn up to actual classes. And I've not really sewn with stretch fabric much, or even attempted swimwear, so I thought it would be a good challenge.

Imagine my dismay when I was phoned a few days before the class to be advised that unfortunately they didn't have enough numbers for the class to run. Not to be dissuaded from my plan to use classes to kick my sewing butt in gear, I have picked another class - Screen Siren 1960's Frock - which uses this Butterick pattern B6582.

I ordered the pattern online last week and hopefully it will arrive this week before the class starts on Sunday. I also need to buy fabric. I'm undecided on which version to do. Do I go for the full-skirted version in a light, summery fabric? Or the sheath dress in a darker, evening tone? I'm tempted to go for the sheath dress as that will require more fitting and I'll be grateful to have someone on hand to help with that. I can always make the full-skirted version after the class. I think I shall have to have a little expedition to the Brunswick fabric shops to see what jumps out and grabs me.

In other news, my boss gave me The Secret Lives of Dresses by Erin McKean when I saw her the other day. She picked it up because she thought it would be the sort of book I'd like. I then realised that it is written by Erin from A Dress a Day, who I've been following for a couple of years now. I just finished reading it this afternoon and loved it. A beautiful story, I recommend it to anyone with a deep, heart-felt passion for the clothes of yesteryear.